A Western blot rests on two electrophoresis steps. SDS-PAGE first separates denatured proteins by size in a vertical polyacrylamide gel; a second electric field, applied across the gel, then moves the separated proteins onto a membrane where antibodies can reach them [1][2]. Western blot transfer is where many blots succeed or fail, because the gel, membrane, buffer, time and heat all interact. This guide covers mini gels, tank (wet) versus semi-dry transfer, the transfer sandwich, field strength and heat, transfer time by protein size, transfer tanks and troubleshooting. For where these steps sit in the wider bench workflow, see From Extraction to Gel Viewing: A Molecular Biology Bench Workflow with PCR, qPCR and Electrophoresis.
Quick answer:
- Two steps: SDS-PAGE separates proteins by size in a vertical gel; an electric field across the gel then moves them onto a nitrocellulose or PVDF membrane [1][3].
- Tank (wet) transfer: the gel–membrane sandwich stands upright in a buffer-filled tank between wire electrodes; it can be useful for larger proteins, but time and heat management depend on the protein, buffer and apparatus [3–5].
- Semi-dry transfer: the sandwich lies flat between plate electrodes, with the buffer held in soaked filter paper; it is quicker but can be less efficient for very large proteins [3][6].
- Orientation: SDS-coated proteins move towards the anode (+), so the membrane goes on the anode side of the gel [4].
- Time depends on size: small proteins leave the gel quickly and can pass through the membrane; large proteins need longer, less methanol or a little SDS [3][7].
1. SDS-PAGE in Brief
Under reducing SDS-PAGE conditions, samples are heated with sodium dodecyl sulfate (SDS) and a reducing agent. SDS denatures the proteins and gives them a broadly similar negative charge per unit mass, so migration through the gel is governed mainly by size; the approximate SDS-to-protein ratio is 1.4 g per gram [8]. That relationship made SDS-PAGE a standard way to estimate polypeptide molecular weight [9][10].
An SDS-PAGE vertical gel is cast between two glass plates and run with the sample wells at the cathode end, so the negatively charged complexes move down towards the anode [8]. Protein gels usually use a discontinuous buffer system: a short, low-percentage stacking gel at pH 6.8 concentrates each sample into a thin band before it enters the resolving gel, where the separation by size takes place [8][11][12].
Acrylamide percentage sets the pore size. Lower-percentage gels have larger pores and resolve large proteins, higher-percentage gels resolve small ones, and gradient gels cover a broad range [8]. Choose the gel percentage for the protein-size range being resolved; the lowest percentage that still gives that resolution also eases transfer, and gel thickness affects transfer too [4][13]. Tricine–SDS-PAGE is used to resolve low-molecular-weight proteins, including proteins below about 30 kDa [14][15].
| Target protein size | Gel choice (literature examples) |
|---|---|
| Above about 200 kDa | Low-percentage gel, for example 7.5% [16] |
| Below about 20 kDa | High-percentage gel, for example 20% [16], or a Tricine gel [15] |
| Broad or unknown range | Gradient gel, lower percentage at the top [8] |
Table 1. Gel choice by protein size; starting points from the literature, not fixed rules.
Calculated illustration, not a specification. Inputs are hypothetical, not a recommended setting and not an ALab specification: a 12% resolving gel made from a 30% acrylamide stock in a total volume of 10 mL. From C1V1 = C2V2, the stock volume is 10 mL × 12 ÷ 30 = 4.0 mL; your protocol supplies the rest.
Calculated illustration, not a specification. Inputs are hypothetical, not a recommended setting and not an ALab specification: a marker with bands at 150, 100, 75, 50, 37, 25, 20 and 15 kDa at relative mobilities (Rf) of 0.10, 0.21, 0.31, 0.45, 0.56, 0.70, 0.78 and 0.88. A straight-line fit gives log10(MW) = 2.276 − 1.257 × Rf (R² = 0.999), so a band at Rf 0.50 reads about 44 kDa, an apparent value valid within the marker range [8][10].
2. Hand-Cast and Precast Mini Gels
Precast gels come in many percentages and chemistries, including gradients that are hard to pour, and avoid handling acrylamide monomer [8]; commercial gels are generally more consistent than hand-cast ones [16]. Acrylamide can be absorbed through the skin, affects the nervous system and is classed by NIOSH as a potential occupational carcinogen; avoid skin and eye contact and follow the reagent's safety data sheet and local laboratory controls when casting [17].
Thinner gels transfer more completely and quickly, down to about 0.4 mm [4], and one manufacturer notes that proteins transfer out of a 1.0 mm gel more easily than out of a 1.5 mm gel [13].
On the ALab™ DL-Mini01 Vertical Electrophoresis Tank (Double Plate), two 8.3 × 7.3 cm gels run at a time, at a thickness of 0.75, 1.0 or 1.5 mm, with 10- and 15-tooth combs and short and long glass plates of 10.1 × 7.3 cm and 10.1 × 8.2 cm. Opening the lid cuts off the power, and the lid is keyed so the electrodes cannot be connected the wrong way round. The DL-Mini01 can be used together with the DL-ZY02.
The ALab™ DL-MINI04 Vertical Electrophoresis Tank takes hand-cast 8.3 × 7.3 cm or precast 8.6 × 6.8 cm gels. It is set up for 1.0 mm gels by default and uses a cam-lock gel frame; 10-well combs are supplied, and a 15-tooth comb is specified as an option.
| Model | Gel size | Gels per run | Gel thickness | Combs |
|---|---|---|---|---|
| DL-Mini01 | 8.3 × 7.3 cm | 2 | 0.75, 1.0 or 1.5 mm options | 10- and 15-tooth |
| DL-MINI04 | hand-cast 8.3 × 7.3 cm; precast 8.6 × 6.8 cm | — | 1.0 mm by default | 10-well supplied; 15-tooth optional |
Table 2. ALab vertical mini-gel tanks. — = not specified.
3. Running the Gel
Start from the protocol for your gel system. In Tris-glycine gels, resistance rises during the run, so at constant voltage the current falls [13]. Many protocols stop the run when the dye front reaches the bottom of the gel [5].
The ALab™ DL-MINI04 Vertical Electrophoresis Tank lists an SDS-PAGE electrophoresis time of 45 minutes at 200 V constant voltage. The gel percentage, buffer, current and temperature are not specified with that figure. It is a specified condition for this tank, not a complete protocol or a setting to carry over to other gels or tanks; use a validated protocol for your gel and buffer system. Constant voltage, current and power modes and Joule heating are covered in Electrophoresis Power Supply Settings: Constant Voltage, Current or Power and Joule Heating.
For blot transfer, the DL-MINI04 is specified as compatible with the DL-ZY03.
4. Tank (Wet) Transfer vs Semi-Dry Transfer
Towbin and colleagues introduced electrophoretic transfer of proteins from polyacrylamide gels to nitrocellulose sheets in 1979; with SDS gels the band pattern was kept without loss of resolution, although the transfer was not quantitative [1]. Burnette's 1981 paper on transfer from SDS gels to unmodified nitrocellulose gave the method its name [18].
In tank transfer, also called wet transfer, the gel and membrane are pressed together in a sandwich of filter paper and pads, held upright in a tank of transfer buffer between platinum or stainless-steel wire electrodes [3][4]. One manufacturer lists 5–30 V or 0.1–1 A for tank transfer, from about 1 hour to overnight; for a single gel, a high-field option can shorten the run to as little as 30 minutes but needs a cooling system [3]. These are source-specific examples, not universal settings.
In semi-dry transfer, first described as an apparatus without a buffer tank, the sandwich lies flat between two plate electrodes, and the buffer is the liquid held in soaked filter paper [4][6]. Several gel assemblies can be stacked and less power is needed [4]; membrane and paper are cut to gel size without overhangs [3].
In one quantitative study, semi-dry blotting moved about two-thirds of the protein in the first hour, while tank transfer without SDS depended on protein size and charge, and large or basic proteins needed SDS in the buffer [19]. A manufacturer summary notes that semi-dry transfer can be less efficient for proteins above 300 kDa [3]. One review favours tank transfer for larger proteins [5], but this is not a universal ranking: protein size, charge and buffer composition matter [19], and some rapid semi-dry systems can give similar quality [20].
| Feature | Tank (wet) transfer | Semi-dry transfer |
|---|---|---|
| Sandwich position | Upright, immersed in buffer [3] | Flat between plate electrodes [3] |
| Electrodes | Wire electrodes in a tank [4] | Plate electrodes, often graphite or stainless steel [4] |
| Buffer | Tank filled with transfer buffer [3] | Buffer held in soaked filter paper [6] |
| Time (one manufacturer's guide) | 1 hour to overnight [3] | 10–60 min [3] |
| Large proteins | Often used for larger proteins [5] | Can be less efficient above 300 kDa [3] |
Table 3. Tank versus semi-dry transfer, from the cited literature.
5. Building the Transfer Sandwich
Nitrocellulose binds protein well but is fragile; PVDF is stronger and can be reprobed, though its background can be higher [5][16]. A 0.45 µm pore size suits general use, while 0.1 or 0.2 µm membranes are recommended below about 20 kDa [3]. PVDF also allows direct sequencing from the blot [21].
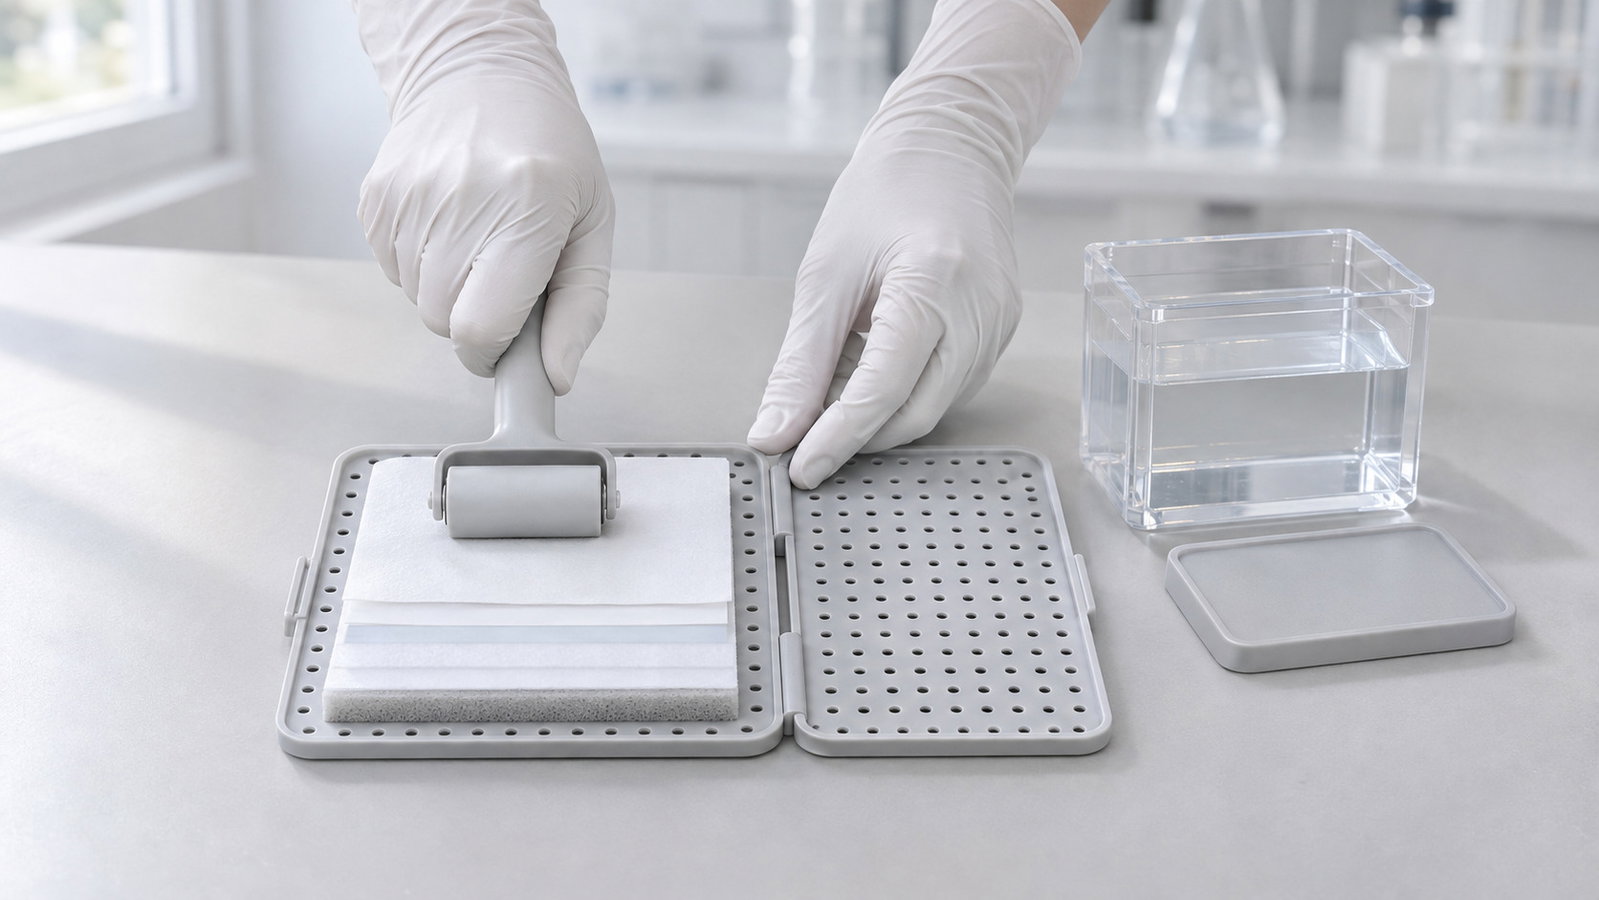
SDS-coated proteins leave the gel as anions, so the membrane goes on the anode (+) side of the gel [4]. A typical stack, from the cathode side to the anode side, is: cassette side, sponge pad, filter paper, gel, membrane, filter paper, sponge pad, cassette side [5][16].
- Cut the membrane and filter paper to gel size [5].
- Pre-wet PVDF in methanol or ethanol, then transfer buffer; nitrocellulose goes straight into buffer [4][13].
- Equilibrate the gel and soak pads and paper in buffer; squeeze air out of the pads, since bubbles block transfer [3][13].
- Roll out bubbles between gel and membrane, using plenty of buffer [5][20].
- Close the cassette firmly; poor assembly gives uneven transfer [20].
- Insert the cassette with the membrane facing the anode, checking the electrode markings first.
The ALab™ DL-ZY02 Transfer Electrophoresis Tank uses open gel holder cassettes with sponge pads, and a bubble roller is included.
6. Field Strength, Electrode Distance and Heat
For a simple, uniform electrode gap, the nominal average field is the applied voltage divided by the gap distance; this is an illustration, not a measurement of the field within a particular gel. In blotting, proteins travel just the thickness of the gel, so blotting uses a lower voltage than the run, while the larger cross-section calls for a higher current [13].
Calculated illustration, not a specification. Inputs are hypothetical, not a recommended setting and not an ALab specification: 100 V across a hypothetical 10 cm electrode gap gives a nominal average field of 10.0 V/cm. Halving the voltage to 50 V gives 5.0 V/cm, and 100 V across a hypothetical 5 cm gap gives 20.0 V/cm.
Current produces Joule heat. At constant voltage the current rises as salts leave the gel and the buffer warms; above about 500 mA heating can become a problem in tank systems, and cooling elements are recommended [4]. Warm buffer can raise background, reduce transfer efficiency and deform the membrane, so buffers are often pre-chilled and tanks commonly hold ice blocks [16]; some protocols run the transfer on ice [5].
Calculated illustration, not a specification. Inputs are hypothetical, not a recommended setting and not an ALab specification: 100 V and 0.3 A for 60 minutes in 1,000 mL of a water-like buffer. Power is 100 V × 0.3 A = 30 W, which over 3,600 s is 108 kJ. With a specific heat of 4.18 J/(g·K) and no heat lost, the buffer would warm by up to 25.8 K; at 0.15 A the power is 15 W and the upper bound is 12.9 K. Real tanks lose heat, so the rise is smaller.
For the ALab transfer tanks, the DL-ZY02 lists electrode spacing 4 cm. The DL-ZY03 lists 4 cm between the positive and negative electrodes, and the DL-ZY04 lists 5.5 cm. These figures describe geometry, not a speed, field-strength or efficiency ranking; settings still come from your protocol.
For the DL-ZY02, the standard configuration lists one ice cooling unit and two blue cooling units. The DL-ZY03 and the DL-ZY04 each have a built-in blue cooling unit. Power supply modes and heating are covered in Electrophoresis Power Supply Settings: Constant Voltage, Current or Power and Joule Heating.
Switch off the power supply before opening a tank or lifting out a cassette. Methanol-containing buffer needs gloves and ventilation, and its waste is handled as hazardous [3].
7. Transfer Time and Protein Size
Small proteins leave the gel quickly and large ones slowly; long runs risk blow-through of proteins below about 30 kDa on 0.45 µm membranes [3]. Too short a transfer leaves protein in the gel and gives a weak signal; too long a transfer lets proteins pass through the membrane [16]. A later review reports that Burnette's original transfer ran for 22 hours [16].
The standard Towbin buffer contains 25 mM Tris, 192 mM glycine and 20% methanol, with no SDS or up to 0.01% [4]. Methanol helps strip SDS from proteins and improves binding to the membrane, but it shrinks the gel; 10–15% suits general use, and for proteins above about 150 kDa results are often better without it [3][4]. A little SDS helps large proteins leave the gel [7][19], while SDS-free buffer helps small proteins bind [22].
A two-step transfer, about 1 mA/cm² for 1 hour and then 16–20 hours at 3.5–7.5 mA/cm², covered proteins from about 8 kDa to over 400 kDa [7]. Conditions tuned for large proteins often lose small ones [23].
| Protein size | Common adjustments (literature) |
|---|---|
| Below about 20 kDa | 0.1 or 0.2 µm membrane; shorter transfer; no SDS in the buffer [3][22] |
| About 20–150 kDa | Towbin-type buffer with 10–15% methanol; 0.45 µm membrane [3][4] |
| Above about 150 kDa | Lower-percentage gel; less or no methanol; up to 0.01% SDS; longer transfer [4][7][16] |
Table 4. Transfer adjustments by protein size; starting points from the literature.
8. Choosing a Transfer Tank
Ask how many gels you transfer at once and how the tank is cooled.
The DL-ZY02 is for transferring small (mini-format) protein gels and is specified for use with the DL-Mini01 and DL-MINI04. The DL-ZY02, DL-ZY03 and DL-ZY04 each list a 99.99% platinum electrode, a transparent polycarbonate tank body, open gel holder cassettes and a bubble roller.
| Model | Gels per run | Effective transfer area | Electrode spacing | Cooling | Cassettes / sponge pads |
|---|---|---|---|---|---|
| DL-ZY02 | two 83 × 73 mm | 110 × 90 mm | electrode spacing 4 cm | one ice cooling unit and two blue cooling units (standard configuration) | 2 / 4 |
| DL-ZY03 | two 83 × 73 mm | 110 × 90 mm | 4 cm between positive and negative electrodes | built-in blue cooling unit | 2 / 4 |
| DL-ZY04 | four 83 × 73 mm | — | 5.5 cm between positive and negative electrodes | built-in blue cooling unit | 4 / 8 |
Table 5. ALab tank-transfer systems; not a speed, field-strength or efficiency ranking. — = not specified.
View product / request a quote: ALab™ DL-ZY02 Transfer Electrophoresis Tank.
The ALab™ DL-1B Acetate Membrane Electrophoresis Tank is a single-bridge tank for electrophoresis on acetate membrane strips, in which the strip is the separation support rather than a blotting membrane. It is not a transfer tank and is not part of the Western blot transfer workflow.
9. Troubleshooting
| Symptom | Likely cause | What to try |
|---|---|---|
| No bands on the membrane | Wrong orientation, transfer too short or large proteins retained in the gel | Check that the membrane faced the anode; stain the gel after transfer to see whether protein stayed in it; extend the time or adjust methanol and SDS [4][16] |
| Small proteins missing | Blow-through | Use a 0.1 or 0.2 µm membrane; shorten the transfer [3] |
| Blank circles or patches | Air bubbles | Roll out bubbles; use plenty of buffer during assembly [20] |
| Blurry bands | High voltage or bubbles during transfer | Lower the voltage; rebuild the sandwich [5] |
| Uneven transfer across the blot | Poor contact in the sandwich | Reassemble so all layers press evenly [20] |
| High background or warped membrane | Overheated buffer | Pre-chill the buffer; cool the tank [16] |
Table 6. Common transfer problems and fixes from the literature.
Check each transfer before blocking. A reversible stain such as Ponceau S shows whether protein reached the membrane and how evenly the lanes are loaded [16]. Western blots are generally semi-quantitative, so comparisons need a validated linear range and a loading control or total-protein normalisation [5][20].
10. Frequently Asked Questions
What is a wet transfer Western blot?
It is a Western blot in which proteins move from the gel to the membrane in a tank of transfer buffer, with the sandwich held upright between wire electrodes [3][4].
Which side of the gel does the membrane go on?
On the anode (+) side, because SDS-coated proteins move towards the anode [4].
How long should a Western blot transfer take?
One manufacturer gives about 1 hour to overnight for tank transfer, or as little as 30 minutes for a single gel at high field with cooling; protein size and membrane pore size also affect the time needed, and prolonged runs can let small proteins pass through the membrane [3][16] (§7).
Should I use PVDF or nitrocellulose?
Both work. PVDF needs pre-wetting in methanol or ethanol and can be stripped and reprobed; nitrocellulose is fragile. For proteins below about 20 kDa, choose 0.1 or 0.2 µm pores [3][5] (§5).
Do I need to cool a tank transfer?
Long or high-current transfers produce heat; pre-chilled buffer, ice blocks or a cooling unit keep the buffer cool [4][16] (§6).
11. Related Guides
- From Extraction to Gel Viewing: A Molecular Biology Bench Workflow with PCR, qPCR and Electrophoresis
- Electrophoresis Power Supply Settings: Constant Voltage, Current or Power and Joule Heating