
In professional additive manufacturing, the end of printing is often only the halfway mark. What happens next — support removal, washing, curing, depowdering, heat treatment, machining, firing — is not damage control; it is a planned stage of the process that creates final properties, final dimensions, and final surfaces.1,2 This guide maps the post-processing chain for each process family, from a desktop resin part’s wash-and-cure to a metal component’s stress relief and hot isostatic pressing, and shows how to plan the chain from the requirement backwards.
Post-processing is the plan, not the patch
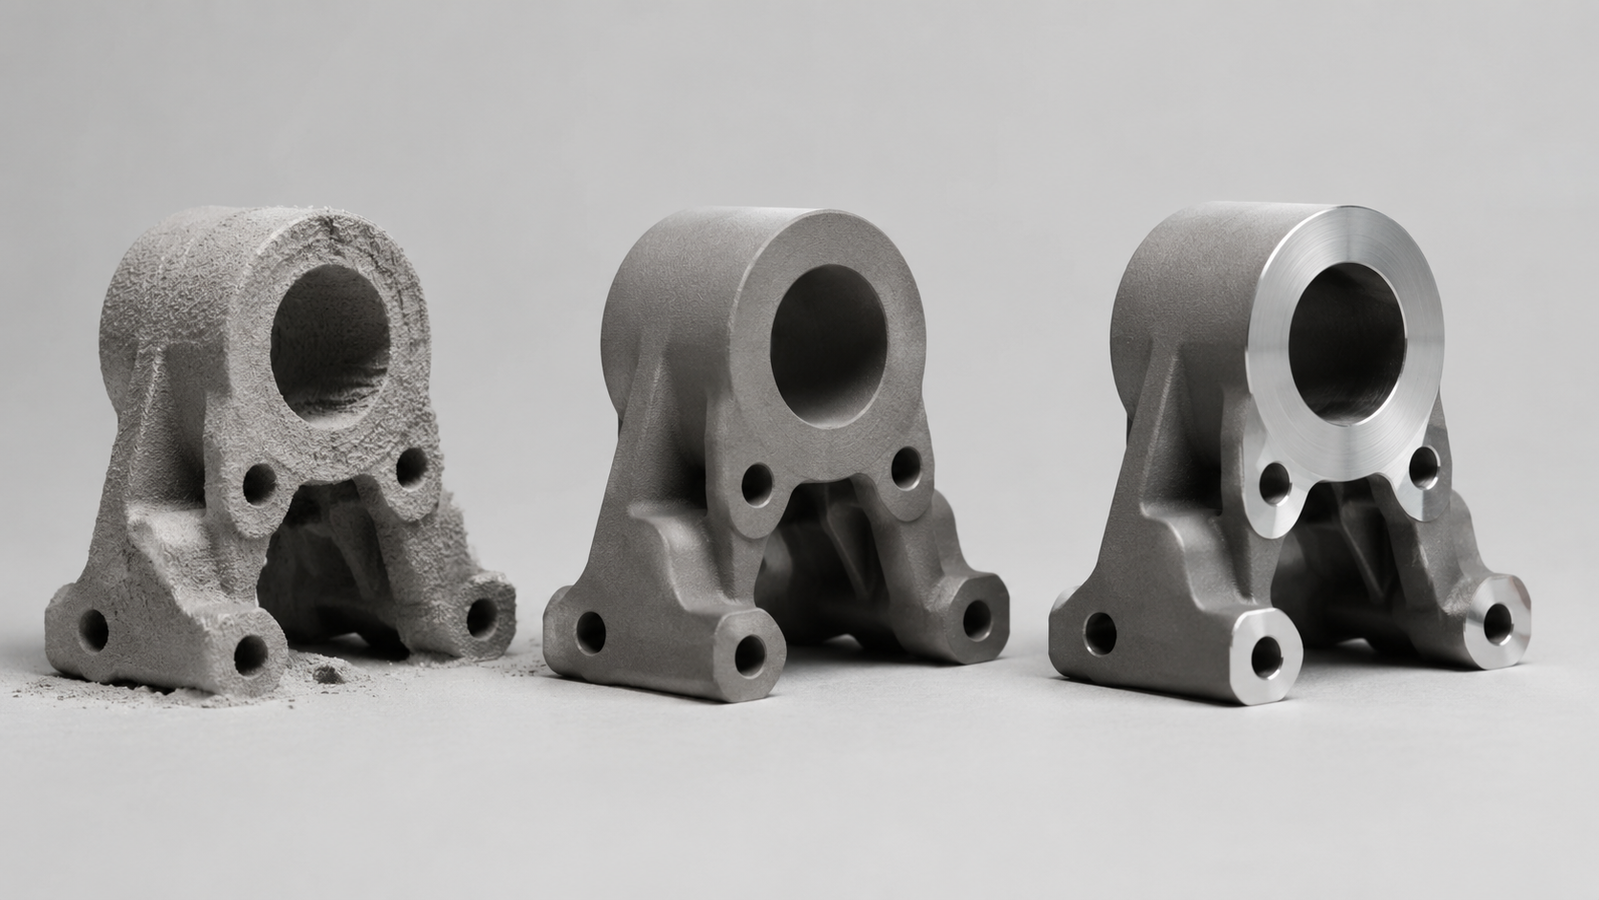
Additive parts leave the machine in an intermediate state by design: supports attached, powder embedded, resin uncured at the surface, stresses locked in, binder still holding ceramic particles together.1,2 The downstream chain converts that intermediate object into an engineering component — and because several of its steps (furnace cycles, machining setups) dominate cost and schedule, professional workflows scope the entire chain at quoting time rather than discovering it after the build.2 A useful mental model: the printer establishes the near-net geometry; the downstream chain develops the final dimensions, properties, cleanliness, and surface condition — and several of its steps reshape the part as much as they refine it.
Polymer chains: break away, wash, cure
FDM: support removal where supports were used (breakaway or dissolvable), then optional surface work — sanding, media tumbling, vapor smoothing on compatible materials — each trading edge sharpness for smoothness.1,2 Resin (SLA/DLP): conventional workflows typically pair a cleaning step to clear uncured resin with a controlled post-cure that completes polymerization and develops final mechanical properties — the exact solvent, sequence, and cure schedule are resin- and equipment-specific, and shortcutting the qualified instructions leaves parts tacky, weak, or dimensionally unstable. Hollow volumes shed uncured resin through drain holes before washing and dry thoroughly before post-cure; supports come off where used, in the sequence the material and geometry call for.3 Dyeing and clear-coating extend the cosmetic range. Which polymer route makes which chain worthwhile is part of the trade space in our FDM vs SLA vs SLS comparison.
Powder beds: excavation and refresh
SLS and MJF builds come out as a cake of powder with parts buried inside. Post-processing starts as excavation: cooldown (rushing it distorts parts), breakout, then depowdering by brush and compressed air — including from internal channels, which is why enclosed voids need escape holes designed in. Bead blasting is the common next step for a uniform surface, not part of the excavation itself.4,1 The default finish is a uniform matte; tumbling and dyeing are the common upgrades. Unfused powder is partially refreshed and reused under material-specific rules that affect both economics and part quality.4
Metal: heat, cut, densify, machine
Metal laser powder bed fusion often carries one of the most extensive qualified post-processing chains — especially where residual stress, fatigue, pressure integrity, or tight interfaces matter. Many workflows perform stress relief while the part is still attached to the build plate, to reduce the risk that stored stress distorts the part when it is released; the qualified sequence remains alloy-, geometry-, machine-, and application-specific.5,6 Then wire-EDM or sawing off the plate, support removal where supports were used, and the requirement-driven heavy hitters: hot isostatic pressing to reduce certain forms of internal porosity, alloy-specific heat treatment to set microstructure and properties, and finish machining on every surface that must hold a tight tolerance or fine finish.7,8,5 Bead blasting or polishing closes the cosmetic gap. The full metal design-and-finish conversation lives in our metal 3D printing guide, and our metal 3D printing service quotes the whole chain, not just the build.
Ceramic: the furnace is the process
For binder-based, sintering-densified ceramic routes — not every ceramic AM route — what other families call post-processing is the main event: debinding removes the sacrificial binder, and sintering densifies the particle network into the final ceramic — creating the material itself, along with substantial, calibrated shrinkage.9,10 After firing, diamond grinding and lapping bring critical interfaces to tolerance, because fired technical ceramics are machined only with difficulty and intent. The full print–debind–sinter story, including the dimensional-change arithmetic, is our guide to how ceramic 3D printing works.9
Interactive: post-processing route builder
Pick a process family and watch its chain assemble — typical core solid, conditional and requirement-driven steps dashed.
Choosing the chain by requirement
Work backwards from what the part must do. Tight fit or sealing surface? Plan machining stock and a machining setup — as-printed processes rarely hit bearing-grade tolerances directly; the budget logic is in our precision and tolerance guide.5,11 Fatigue- or pressure-critical metal part? Evaluate whether HIP and alloy-specific heat treatment are justified by the defect-acceptance criteria, material specification, and qualification route — and include them in the quotation when required.7 Cosmetic surface? Choose the finishing route (tumble, blast, smooth, dye, polish) at the same time you choose orientation, because scars and down-skins decide where finishing effort goes. Just a form-check prototype? The typical core alone may be the whole chain — and the fastest, cheapest version of the part. Verification closes the loop in two ways: project-specific witness coupons — fired or finished alongside the batch — demonstrate material response, orientation, heat-treatment, shrinkage, and finishing effects for the selected route; separately, standardized artefacts such as those in ISO/ASTM 52902 support AM-system geometric capability assessment and calibration.11 (This guide uses the ISO/ASTM 52900 process-family vocabulary; the chains above are representative models, not universal prescriptions.)12
FAQs
1. Is post-processing always required for 3D printing?
Almost every route requires at least release, cleaning, or verification — but no single downstream step is universal. Conventional resin parts are cleaned and post-cured where the qualified resin instructions require it; powder-bed parts are depowdered; many metal LPBF workflows include route-dependent thermal treatment; and binder-based, sintering-densified ceramics are debound and fired. Finishing beyond that is requirement-driven, and even a “raw” part has been through its route’s core.1,3
2. Why are many LPBF parts stress-relieved before build-plate removal?
Laser melting can lock residual stress into the part while the build plate holds it flat, so many workflows relieve that stress thermally before cutting the part free, reducing the risk of release distortion. It is a common qualified sequence, not a universal law — alloy condition, geometry, support strategy, and qualification requirements set the actual order.5,6
3. What does HIP do for metal 3D printed parts?
Hot isostatic pressing applies elevated temperature and isostatic gas pressure to reduce certain forms of internal porosity; its effect on final performance depends on the alloy, the defect population, the heat-treatment sequence, and the service requirement, so it is evaluated — and planned alongside heat treatment — against the qualification route.7
4. Can 3D printed parts be machined?
Yes — and tolerance-critical surfaces usually are. Polymers and metals machine conventionally (with fixturing care); fired technical ceramics require diamond grinding and are finish-ground only where function demands it.5,9
5. How much does post-processing add to cost and lead time?
It varies too widely for a universal figure — furnace cycles and machining setups often dominate both. The reliable approach is to scope the full chain at quoting time so the printer’s speed is not mistaken for the project’s speed.2
References
This article is provided by ACS Material LLC for educational purposes and describes typical post-processing chains in additive manufacturing. Which steps apply, their sequence, cycle parameters, achievable finishes, and cost or lead-time impacts vary with process, machine, material, geometry, and provider; nothing here is a guarantee for a specific part. Heat treatment, HIP, and firing schedules are alloy- and material-specific and set by qualified process engineering. The interactive route builder is a qualitative teaching aid.