
The pellet came out of the die looking perfect: flat, sharp-edged, a clean gray disc. An hour later it had a hairline crack around its rim, and after firing it was a shallow dish. Nothing was wrong with the press. A likely cause is one that every die shares: the powder at the top of the die had been pressed harder than the powder at the bottom, and the difference stayed hidden until the load came off and the furnace went on. Uniaxial pressing is the fastest way to turn powder into a solid shape, and many of its problems trace back to that one cause. This guide explains that cause, the pressing cycle that works around it, and the laboratory presses that run the cycle.
In one paragraph: powder in a die does not behave like a liquid. Friction against the die wall carries part of the load, so pressure falls with distance from the moving punch and the compact tends to be denser at one end than the other. Thin pellets are little affected; in tall ones the effect can show as soft ends, cracks on release or warping in the furnace. The remedies are geometric and procedural before they are mechanical: keep the pellet thin relative to its diameter, press from both ends when it cannot be thin, raise and release the load smoothly, and choose a pressure the die and the powder can both take. A manual press does all of this; an automatic press does it identically every time.
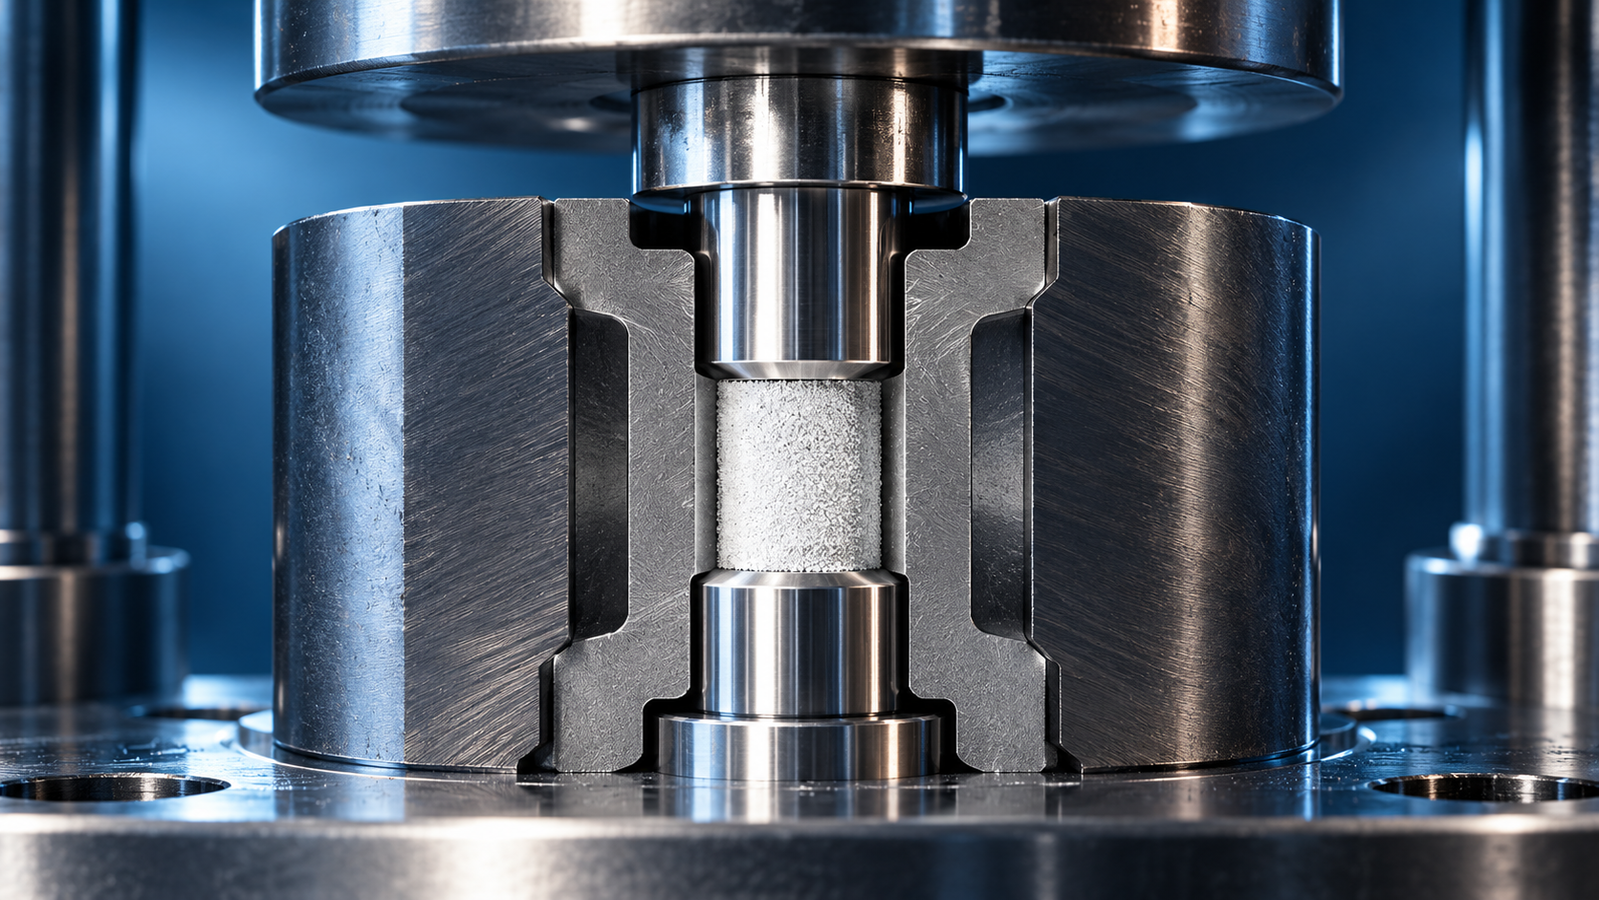
1. What happens to powder in a die
Loose powder poured into a die is mostly air; typically well under half the volume is solid. As the punch advances, three things happen in overlapping stages.
- Rearrangement. Particles slide and rotate into the gaps between their neighbors. Density rises quickly for little pressure. Granulated and free-flowing powders pack well here; fine, cohesive powders bridge and trap air.
- Deformation and fracture. Once particles are locked together, further densification needs them to change shape. Soft materials such as KBr, polymers and many metals flow plastically at the contacts. Hard, brittle materials such as oxides fracture, and the fragments fill the remaining pores.
- Elastic compression. Near the top of the pressure range, the compact stores elastic energy like a spring. That energy is returned when the load is removed, and the way it is returned decides whether the pellet survives.
The compact that leaves the die keeps a record of all three. Density variations and flaws introduced at this stage are not healed by firing; they are carried into the final part,1 which is why forming is treated as part of the sintering process and not as a separate step.
2. Why density is never uniform: wall friction
If powder were a liquid, the pressure under the punch would be the same everywhere in the die. It is not, because the powder pushes outward against the die wall as it is compressed, and the wall pushes back with friction that opposes the motion of the powder. Each layer of powder passes on a little less force than it receives. The pressure therefore decays with depth below the moving punch, and where the pressure is lower the density is generally lower too.
The effect has been measured directly and reproduced in finite-element models of ceramic and pharmaceutical compacts: wall friction sets up a density distribution inside the pellet.2,3,4,5,6 A simple force balance on a thin slice of powder gives the scale of it:
Here D is the die diameter, μ is the friction coefficient between powder and wall, and K is the fraction of the axial pressure that the powder transmits sideways. Three consequences follow, and they are the practical content of this whole guide.
- Aspect ratio enters directly. The decay depends on depth divided by diameter. With μ = 0.2 and K = 0.4 as illustrative values, the formula gives a loss of about 5 % across a 3 mm pellet in a 20 mm die and about 27 % across a pellet as tall as it is wide. Higher friction gives larger losses at any shape: with μ = 0.5 and K = 0.6, a pellet only half as tall as it is wide loses 45 %. No aspect ratio is safe for every powder.
- Friction is the variable you can change. A polished, undamaged die bore and a trace of die-wall lubricant lower μ. A scored bore raises it, and the score marks print onto every pellet.
- Pressing from both ends halves the distance. In a double-action die both punches move relative to the die body, so the lowest pressure is at mid-height and the distance from a punch face is half as great.7
The model below lets you set the aspect ratio and the two coefficients and see how much of the applied pressure reaches each part of the pellet. It is an idealization: μ and K are held constant, whereas in real powders both change with pressure and density. Use it to see how shape, friction and pressing scheme interact, not to predict a density or to decide that a part will crack or warp.
In this model more force does not remove a gradient. Doubling the applied pressure doubles the pressure at both ends; the ratio between them stays the same. What changes the ratio is geometry, friction and the pressing scheme. Real friction varies with pressure, so the ratio is a guide to the trend, not an exact figure.
3. The pressing cycle: load, hold, release
A pressing cycle has three parts, and each has its own way of spoiling a pellet.
Loading
Air has to leave the powder as it compacts. If the load rises faster than air can escape through the shrinking pores, the air is compressed inside the pellet and expands again when the load is released. Fine powders are the most affected. Raise the pressure steadily, pause part-way if the powder is very fine, and use an evacuable die where the method calls for it; cylindrical PressPro™ dies up to 25 mm have a vacuum port for this purpose.
Holding
Under constant load the powder continues to settle for a short time and the pressure reading on a manual press drifts down. A hold of some seconds to a few minutes lets the compact relax and lets remaining air escape. On a manual press the operator tops the pressure up by hand; the PressPro™ manual frames hold to within 1 MPa of gauge reading over ten minutes. Electric and automatic presses compensate automatically.
Releasing
Many cracked pellets are made at this step. When the axial load is removed the compact relaxes while the die wall still holds its sides. A cap that lifts off the top face is capping; a pellet that splits into flat layers has laminated. Both have been studied most closely in pharmaceutical tablets. On a compaction simulator, with one model formulation prone to capping and one prone to lamination, the way the tablet was unloaded changed the result: unloading with the lower punch held fixed suppressed lamination and confined capping to the upper face, and keeping a small load on both faces until the end of ejection eliminated both defects.8 Lamination also has more than one cause. It has been classified into a type caused by trapped air, a type caused by shear stress as the tablet leaves the die, and a type specific to convex tablets. Slowing the press or adding a pre-compression step mitigated the first, only a tapered die stopped the second, and none of the measures tested fully solved the third.9 In convex tablets it is favored by high compaction pressure and by the pressure the die wall still exerts after unloading, and the crack can stay hidden inside the compact.10 The mechanical behavior of powders during compaction has also been modeled.11 These results are for tablet formulations and do not transfer to every powder as a recipe. What they show is that the remedy depends on the mechanism. Releasing the load gradually, and in the same way every time, is common bench practice and makes the release a controlled variable; it is not a finding of these studies. On an automatic press the timed release repeats it every cycle.
Ejecting
The pellet must then be pushed out of the bore against the same wall friction that shaped it, and the stress of ejection can crack a compact that survived release.12 Push slowly and evenly, support the pellet as it emerges, and for powders that will not release cleanly use a split die, whose inner segments separate so that nothing has to slide.
4. Defects and what they point to
| What you see | Possible cause | What to check or try, one change at a time |
|---|---|---|
| Top face lifts off as a cap | Recovery as the load comes off while the die still holds the sides; trapped air | A gradual, repeatable release; a short hold; lower pressure; an evacuable die |
| Pellet splits into layers | Trapped air; shear as the pellet leaves the die; stress left in the compact after unloading | A hold or an evacuable die for air; the bore and the ejection step; a thinner pellet; lower pressure |
| One end crumbles, the other is hard | Wall friction: lower pressure at the far end | Thinner pellet; double-action die; clean or lubricate the bore |
| Cracks appear during ejection | Ejection stress; scored or dirty bore | Slower ejection; polish or replace the die; split die |
| Pellet sticks to the punch face | Adhesion of fine or soft powder; damp powder | Dry the powder; polished punch faces; a release film |
| Disc warps or cracks in the furnace | Density gradient from pressing; also check the firing schedule and setter | Thinner pellet; double-action or isostatic pressing |
| Vertical scratches on the pellet side | Damaged die bore | Replace the die body; do not exceed its pressure limit again |
The table is a starting point for diagnosis, not a set of prescriptions. Which change helps depends on the mechanism and on the powder, so note at which step the defect appears, change one condition at a time and confirm the result by trial. Only one row points to a different machine; the others point to the cycle or the die. Each defect is taken further, with the evidence behind it, in Pellet Cracking, Capping and Lamination.
5. Choosing the pressure
Work in sample pressure, in MPa, because that is what the literature reports and what transfers between die sizes.
A 13 mm die has an area of 133 mm², so 300 MPa needs 4.1 t. A 20 mm die needs 9.6 t for the same pressure, a 30 mm die 21.6 t and a 40 mm die 38.5 t. Two limits bracket the choice. At the low end, the pellet must be strong enough to handle. At the high end, the die sets the ceiling: PressPro™ pellet dies are intended for use below 800 MPa of sample pressure, and small dies reach that at surprisingly little force — 10.8 t on a 13 mm die, 3.1 t on a 7 mm die. Between the limits, follow the method or the paper you are reproducing, and if there is none, press a short series at increasing pressure and measure the density of each pellet from its mass and dimensions. The tonnage-to-MPa calculator converts in both directions.
6. From green compact to sintered part
For a compact that will be fired, uniformity matters more than the highest possible density. Green density changes the rate at which a compact densifies: in zinc oxide compacts with green densities between 39 and 73 % of theoretical, the densification rate during sintering depended strongly on the starting density.13 A pellet that is denser on one face than the other can therefore shrink by different amounts on its two faces, and bend. The compact also sets the balance between densification and grain growth: in superfine zirconia compacts, a higher green density and narrower particle and pore size distributions favored densification with less grain growth.14
The forming method also sets the temperature the compact needs. In nanocrystalline yttria-stabilized zirconia, a wet forming route that gave more homogeneous green bodies at 60 % of theoretical density reduced the sintering temperature by about 200 °C compared with uniaxial dry pressing, and the final grain size was smaller.15 When a dry-pressed disc will not sinter evenly, the usual next step is to keep the die for shaping and add an isostatic pressing step to even out the density; the isostatic press selection guide covers that route.
7. Which press: manual, electric or automatic
The compaction physics is the same on every press. What differs is who controls the cycle.
| PressPro™ family | Force | Cycle control | Readout | Use it when |
|---|---|---|---|---|
| Two-column manual | 2, 3, 5, 12, 15 T | Hand pump, hand release | Pointer gauge to 1 MPa, or digital to 0.01 t | Small dies; the smallest frame weighs 12 kg |
| Four-column manual | 15, 24, 30, 40 T | Hand pump, hand release | Pointer or digital gauge | General pellets and discs |
| Protective manual | 15, 24, 30, 40, 60 T | Hand pump, hand release | Pointer or digital gauge | Brittle samples and larger dies, behind a safety-glass door |
| Electric (EPPIE) | 20, 30, 40, 60 T | Motor pressurizing and pressure compensation; hand release | 4.3-inch touch screen, 0.1 t | Many pellets a day at one setting |
| Automatic (EPPA) | 10, 20, 30, 40, 60, 100 T | Programmed pressurize, hold, compensate and timed release; 5 segments, 30 optional | 7-inch touch screen, 0.1 t; sample pressure in MPa | Hold time or ramp is a variable; results must be comparable |
| Large-tonnage automatic (EPPPE) | 65, 100, 150, 200 T | As the automatic press, with a separate control box | 7-inch touch screen | Large dies at high pressure |
Three details from the specifications are worth knowing before ordering. The piston stroke is short: under 30 mm on frames to 30 T and under 50 mm above that, so the lead screw at the top of the frame is used to close the gap to the die and the hydraulic stroke does only the pressing. The automatic presses accept a set demolding force, which makes ejection as repeatable as pressing. And the general powder presses are supplied without dies; the die selection guide explains which to order.
For choosing between pressing routes rather than between presses, start with the laboratory hydraulic press selection guide.
8. What to write down
A pellet can only be reproduced if the cycle that made it was recorded. Seven entries are enough.
- Powder: material, batch, how it was dried and ground.
- Mass loaded into the die.
- Die: bore diameter, type, and whether it was evacuated or lubricated.
- Force and the sample pressure it corresponds to.
- Time to reach pressure, hold time, and how the pressure was released.
- Pellet mass, diameter and thickness after ejection, and the density calculated from them.
- Anything seen on release or ejection: a sound, a crack, a cap.
9. Related guides and equipment
- How to Choose a Laboratory Hydraulic Press — pellet, hot and isostatic routes compared, with the full PressPro™ range.
- Pellet Press Die Selection — die types, split and double-action dies, and fit checks.
- Tonnage-to-MPa Calculator — force, gauge reading and sample pressure.
- Isostatic Press Selection Guide — when a die is not enough.
- KBr Pellet Preparation for FTIR and XRF Pressed Pellet Preparation — the two most common analytical pellets.
- Manual vs Electric vs Automatic Laboratory Presses — which parts of the pressing cycle each mode takes over, family by family.
- Uniaxial vs Isostatic Pressing — density gradients, geometry and the cost of each route.
- Pellet Cracking, Capping and Lamination — where and when pellets cap, laminate or crack, and what the evidence links to each.
- How to Specify a Pellet-Press Cycle — the numbers that define a pressing cycle, and a method line another laboratory can follow.
- Green Density, Springback and Ejection — measuring density, springback and ejection force, and what compaction equations do and do not show.
- PressPro™ series — all laboratory presses from ACS Material.
10. FAQ
What pressure should I use to press a pellet?
Use the sample pressure given in the method or paper you are following, converted to force for your die. Without a reference, press a series from about 100 MPa upward, measure the density of each pellet, and stop where density levels off or defects appear. Stay below 800 MPa on a standard die.
Why is my pellet denser on one side?
Most often wall friction: the side next to the moving punch received more pressure than the far side. Make the pellet thinner, use a double-action die, or check the die bore for damage.
How long should I hold the pressure?
Long enough for the gauge to stop drifting and for trapped air to escape, which for most powders is between a few seconds and a few minutes. Record the time and keep it constant across a series.
Does pressing harder make a stronger pellet?
Not always. A denser compact is usually stronger, but pressing harder also means more elastic recovery when the load comes off, and past some point pellets can cap or laminate. Where that point lies depends on the powder. Find it with a short series at increasing pressure instead of assuming that more is better.
What is the tallest pellet I can press in a die?
A common working rule is to keep the height below the diameter in a single-action die. The right limit depends on the powder and its friction against the die. Taller parts are usually pressed in a double-action die, and parts several times taller than their diameter are usually made isostatically.
Do I need a binder or a lubricant?
Not always. Plastic materials such as KBr bind themselves. Hard oxide powders often need a small amount of binder to give the green pellet handling strength, and a trace of lubricant on the die wall reduces friction. Both must be compatible with what the pellet is for; an analytical pellet cannot contain anything that shows in the spectrum.
Is an automatic press more accurate than a manual one?
It is more repeatable. The force reading on the automatic PressPro™ presses resolves 0.1 t and the cycle is identical each time. A digital gauge on a manual press resolves 0.01 t, but the ramp, hold and release depend on the operator.